Top Rope Belay Setup Overview
Attire
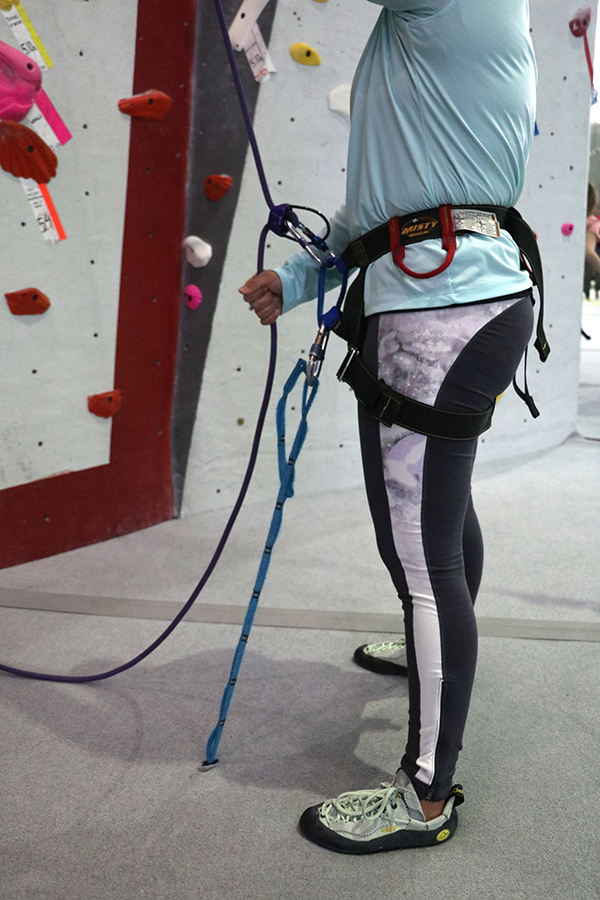
The climber and belayer must wear a harness designed specifically for rock climbing. The harness should fit snugly above the hips, with the buckles for the waist and leg loops doubled back. Climbers are also required to wear shoes designed specifically for rock climbing. If the climber is wearing a helmet, it should be properly fitted and secure.
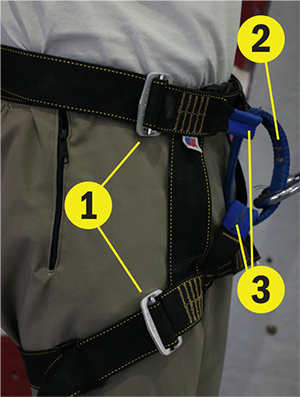
The harnesses that the wall rents out are comprised of simple webbing straps sewn together, incorporating:
- Self-locking buckles which should be doubled back
- A blue or black vertical belay loop, for clipping carabiners to
- Two blue horizontal tie-in loops, also known as hard points, for tying rope to
Tying in the Climber
Choose the strand of rope closest to the wall, to keep the two strands from rubbing against each other. The climber needs to be attached to the rope with a solid connection that cannot come undone during the climb. At LCC we require the climber to tie in with a Figure 8 Follow Through, a knot which can withstand a great amount of load and yet be untied relatively easily after the climb. Follow the harness manufacturer’s specifications on where the knot is tied, typically through both tie-in points. The knot should be tied within 6” of the harness and tightly dressed.The remaining tail must be a minimum of 6” long. Tying off the extra tail is not required for safety,but may be done to keep it out of the way.
| Picture of Steps | Description of Steps |
|---|---|
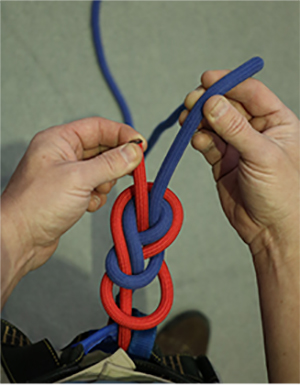
| Tie a Figure 8 knot about 3’ from the end of the rope. Now thread the end through both tie-in points. |
| Retrace the original knot, pulling through completely to cinch the knot close to the harness. |
| Continue to retrace, being sure not to cross over the strand you are following. |
| Complete the retrace, tucking any crossed strands back in place. |
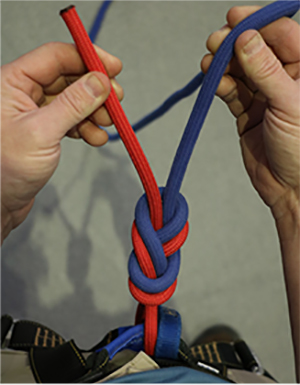
| A properly dressed knot has no gaps and no crossed strands, with at least 6” of tail remaining. |
Basic Climbing Knots Video
At 3:02 we review how to tie a Figure 8 and then the Figure 8 follow Through.
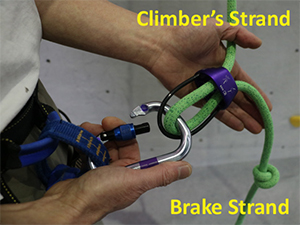
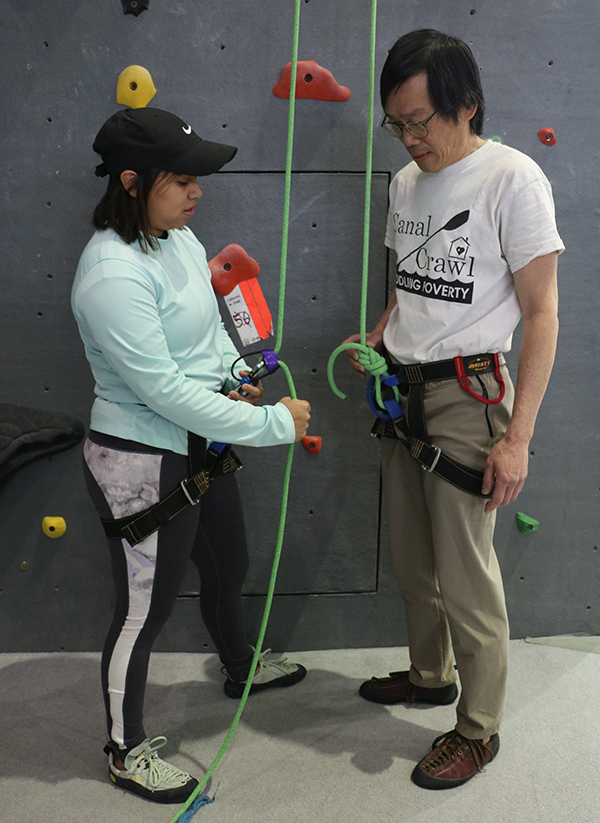
Setting up the Belay Device
The belayer’s strand of rope is threaded through the belay device according to the manufacturer’s specifications and attached to the belayer’s belay loop on their harness using a locked carabiner. Tube style and Assisted Braking devices are both acceptable for top rope belay at LCC. For a basic tube style device, feed a bight of rope through either opening and clip both the bight and device’s keeper loop, with the brake strand feeding out of the bottom of the device. Once clipped, there should be no twists in the system or stands wrapping over each other. Verify the carabiner is locked by performing a squeeze test.
Consider an Anchor
A ground anchor is not required for most climbing at LCC, but should be considered if the climber outweighs their belayer by 50 lbs. or more. To use the fixed ground anchors, attach an additional locking carabiner to your belay loop, below the belay device, and then clip to a loop on the anchor so that it is relatively taut. Mobile sand anchors are also available, and must be used when climbing at “Classic Lindseth.”
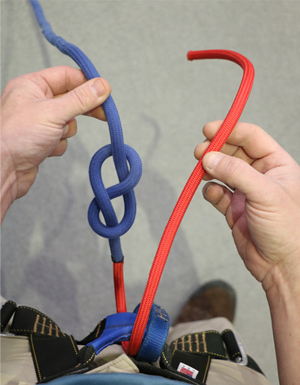
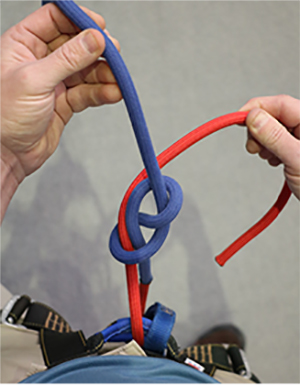
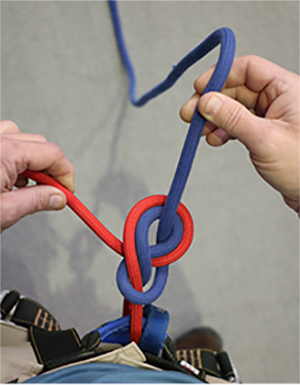
Tie a Stopper Knot
To close the system, tie a stopper knot below the belay device. At LCC we request a Double Overhand stopper knot be tied, with at least 6” of tail remaining. A single overhand knot is not acceptable. While stopper knots are rarely necessary in the gym environment, they are essential for outdoor climbing and are a good habit to get into. A properly dressed barrel knot is identified by the symmetrical "X" on one side and "=" on the other.

Basic Climbing Knots Video
At 11:13 we review how to tie a Double Overhand stopper knot.
Partner Check
Once the system has been setup, the climber and belayer should run through each component of the system together to verify everything is in order. For newer climbers this is a good opportunity to learn about the system; for experienced climbers it is also important to ensure mistakes are not made though complacency. Now is a good time to remove any slack in the system.
Establishing Communication
The following are standard commands used at LCC. Because the climber and belayer are separated, brief commands are used in place of compete sentences. Regardless of the commands used, it is important that both the belayer and climber share a common vocabulary for effective communication. The belayer is expected to review these commands with their climber before the climb.
| Who Says It | Command | What it Means |
|---|---|---|
| Climber | ON BELAY? | Is the system set up correctly? Are you ready to protect me? |
| Belayer | BELAY ON | I have verified the system is set up correctly, and I am now ready to protect you (even if you start climbing right away). |
| Climber | CLIMBING | I am ready to start climbing. |
| Belayer | CLIMB ON | (Even though I was already prepared) You may now climb. Have fun! |
| Climber | TAKE! | I want to let go, please increase the tension quickly! |
| Belayer | GOT! | I have removed any slack and am ready to hold you in place. You may let go with confidence. |
| Climber | UP ROPE | The rope is not tight enough, please increase the tension. |
| Climber | SLACK | The rope is too tight, please release the tension. |
| Climber | ROCK! | Something is falling to the ground! |
| Climber | READY TO LOWER | I have let go of the wall and want to be lowered to the ground. |
| Belayer | LOWERING | I will now lower you in a controlled manner. Sit back and relax. |
| Climber | BELAY OFF | I am safe and no longer need you to protect me. |
| Belayer | OFF BELAY | I have removed the belay device from the system. |
Note: The Climber initiates the Belayer’s actions. Once the “Belay is ON,” the belayer should be focusing on removing slack in a timely manner, responding to the climber’s needs, and being prepared to catch a fall at any moment. A belayer should not TAKE, LOWER, or go OFF BELAY without the climber’s direction. However, words of encouragement during the climb, or gratitude after, are welcome!
For those who must use non-verbal communication at the wall, here is a video of ASL Signs for Indoor Climbing from a deaf community climbing group based in Washington, D.C.
Belay Technique - PBUS or Bust!
The following are the standard motions we require at LCC for safe belay technique. The sequence we follow is PULL, BRAKE, UNDER, SLIDE (PBUS). The brake hand must grip the brake strand at all times and the system must be in brake position when sliding the brake hand up. Waterfall technique, where both hands remain on the brake stand the entire time, is also accepted. Excess slack or crossing over or switching brake hands while belaying, are not accepted. Slip, Slap, Slide technique is not accepted.
| Picture of Motion | Description of Motion |
|---|---|
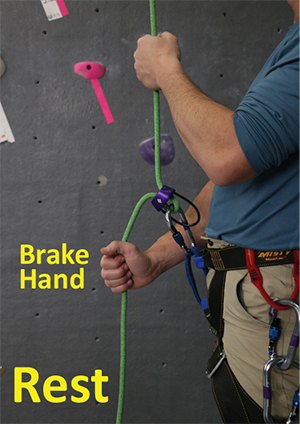
| The brake hand maintains a firm grip on the brake strand, a few inches below the belay device. |
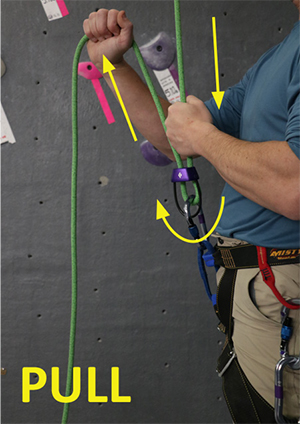
| The device becomes unlocked with the brake hand above it, allowing you to floss the rope slack quickly. |
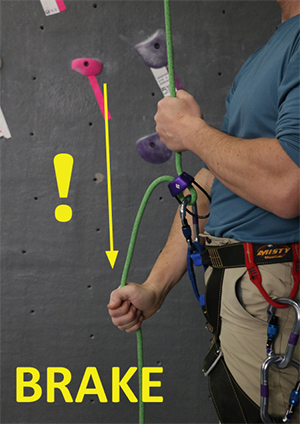
| Immediately bring the brake hand down to allow the device to catch an unanticipated fall. |
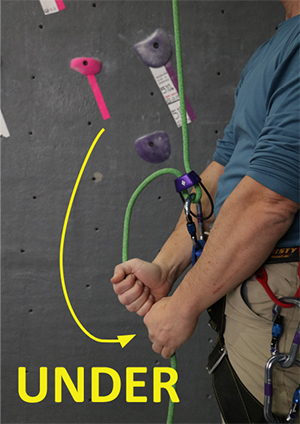
| With your non-brake hand, reach below the brake hand and grip the rope firmly. |
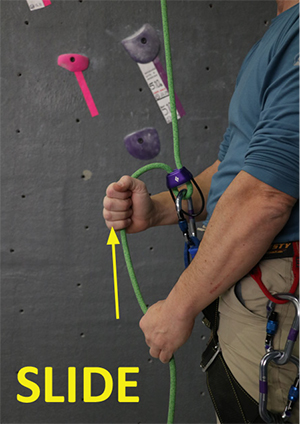
| Relax the brake hand grip and slide it up towards the device, leaving a few inches of space to keep from getting pinched by the device. Tighten your grip with the brake hand,and reset your other hand above the device. |
See it in Action
Top Rope Setup Video
Review the entire setup in our detailed video, then come in and show us what you've learned!