Clipping Techniques and Hazards
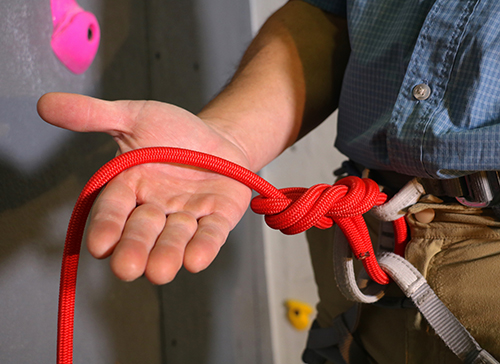
One of the first new skills to master when lead climbing is how to clip the draws in a smooth and efficient motion. The goal when clipping is to clip the rope through the carabiner such that it is not back-clipped or z-clipped, without skipping clips, and to do so without putting any part of your hand through the gate. You should also be able to clip without putting the rope in your teeth.
Clipping Techniques
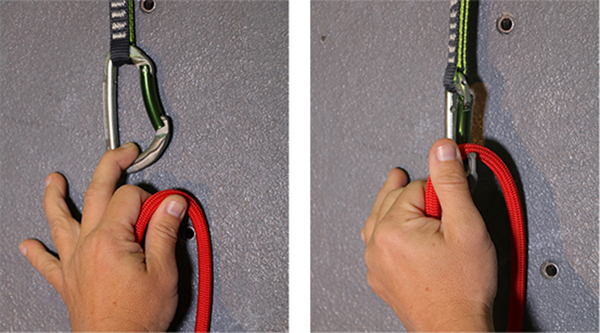
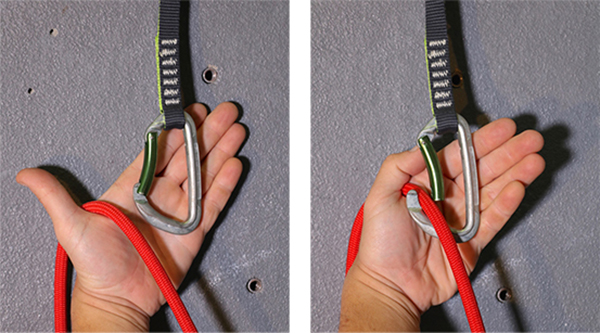
There are four main clipping positions based on the gate’s orientation (inside and outside facing) and which hand you clip with (left or right). For instance, if the clipping draw is to your left, and the gate is facing you, you might make a left-handed inside clip. There is more than one way to make an inside or outside clip. The pictures below show one method, and you can watch our clipping technique video to see this in more detail. Find clipping methods that make sense for you and practice them a hundred times to make them effortless. Regardless of your method, start your clip by grabbing your tie-in knot, then sliding your hand down for the rope segment you will clip.
Clipping Hazards
As you clip, you raise the highest anchor point, which protects you in the event of a fall. Clipping incorrectly exposes you to additional risks, so a leader must be able to recognize errors and know how to correct them. You can watch our clipping technique video to review these in more detail.
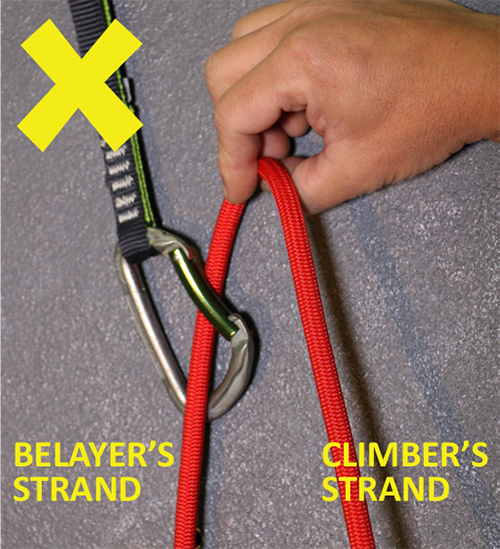
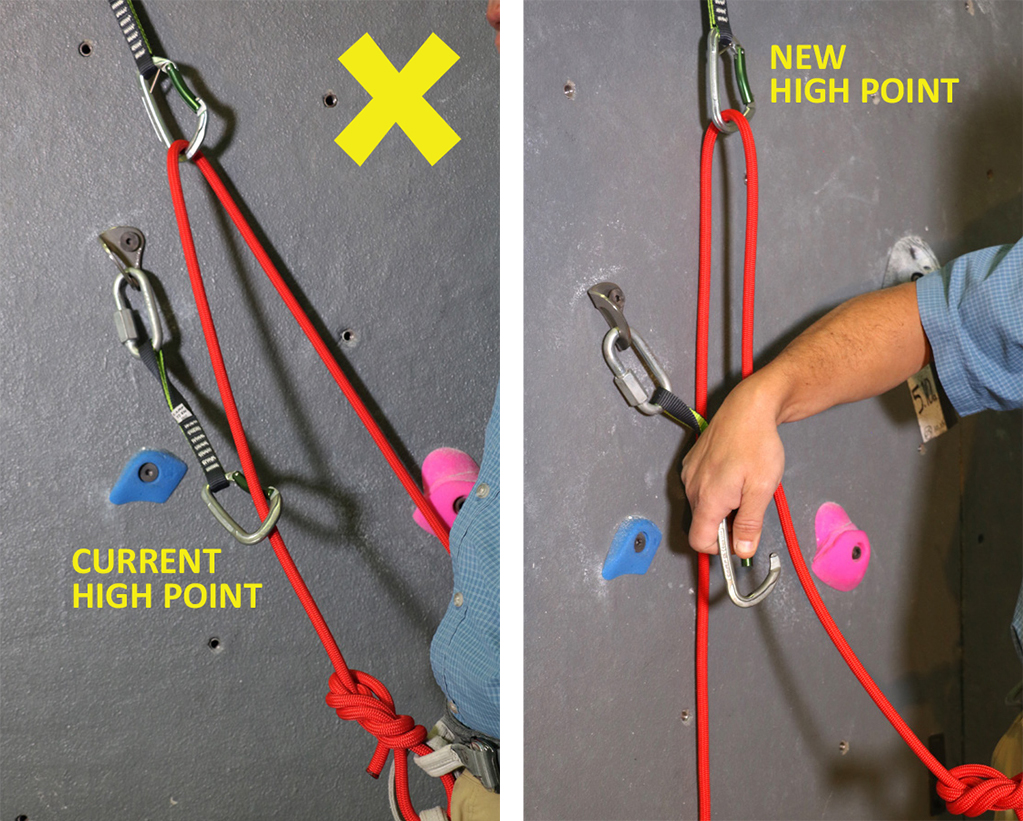
Back-Clip
When the rope has been clipped in the opposite direction, with the climber’s strand trapped between the carabiner and the wall, it is back-clipped. In this position, the rope has a higher chance of catching the gate and unclipping itself in the event of a fall. Fix a back clip by downclimbing to a stance below the draw, unclip by bringing a bight of rope up and through the gate, then reclip properly. “Dumping” the rope is strongly discouraged, as it exposes your hand to serious injury, and is usually difficult to manage.
Z-Clip
When you make your next clip using a bight of rope from below the previous clip, you have Z-clipped. In this position, you have failed to move your anchor point higher than the previous clip, exposing you to a longer, more dangerous fall if you continue. You will also experience significant rope drag if you continue. Fix a Z-clip by down-climbing to a stance where you can reach the lower draw, unclip the lower draw, then reclip it to the other strand in the correct position. This automatically moves your highest anchor point and removes the drag from the system. In this case “dumping” the rope is easier and acceptable. You must then check to make sure your highest clip is not back-clipped (fix it, if it is), as this is sometimes a consequence of a Z-clip. You can avoid Z-clipping by starting your clip by grabbing your tie-in knot, then sliding your hand down for the rope segment you will clip.
Skipping Clips
Skipping clips exposes you to longer, potentially unprotected, falls. Scope out your clipping line before you leave the ground. In cases where the clipping line may be questionable, there should be colored tags on the draws that guide you. If you realize you have just skipped a clip, downclimb and clip it before continuing.
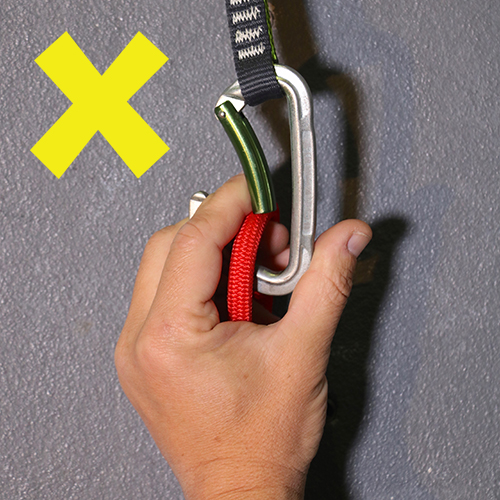
Hand through the gate
When you are clipping, it is best to keep any part of your and from going through the gate. Falling with a part of your hand entagled with the exposed nose of the gate can result in puncture wounds or “de-gloving” of your skin. Use clipping methods that don’t rely on this hazard.Rope in the teeth – Some climbers will temporarily put the rope in their teeth when making a high clip, in order to gather an extra length of rope to clip with. Falling with the rope in your teeth can result in having your teeth pulled out of your mouth. If you must high clip, make a long reach out instead to get the requisite amount of rope. Better yet, climb to a higher stance whenever possible for an easier clip.
Rope in the mouth
Some climbers will temporarily put the rope in their teeth when making a high clip, in order to gather an extra length of rope to clip with. Falling with the rope in your teeth can result in having your teeth pulled out of your mouth. If you must make a high clip, make a long reach out in space to get the requisite amount of rope, then reach up to make the clip. Better yet, climb to a higher, safer stance whenever possible for an easier clip.
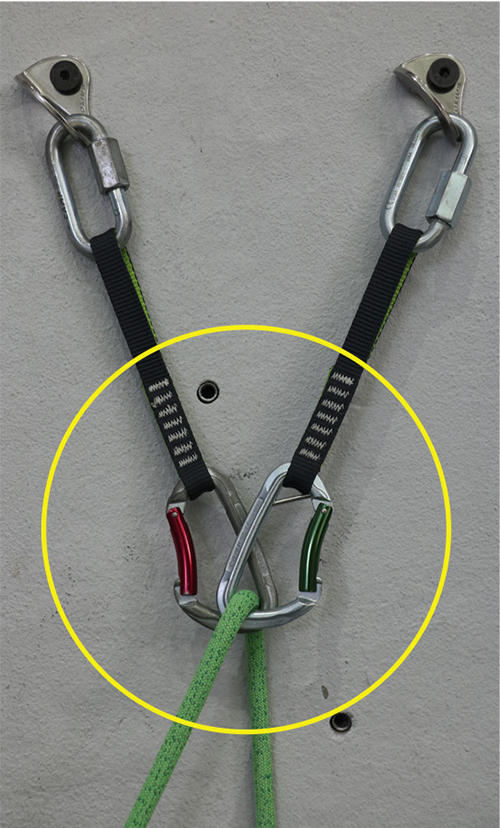
Clipping the Anchors
Anchors provide redundancy at the point most climbers will be lowering from. At LCC we require you to clip the anchors such that the gates are opposed, facing away from each other, with the rope running through both carabiners in their overlapping areas, as a venn diagram. The draws should not be twisted or facing outward.
Next up: Climbing Hazards and Taking Falls